
If you want to have fun while playing the guitar, you have to set yourself up for success. While this entails working on your technique and understanding some guitar theory, it also means knowing how to string your guitar.
Without this technical skill, you’re going to be out of tune constantly, compromising your guitar technique, breaking strings, and overall just not having a good time!
Today, I’ll show you how to string a guitar like a pro. It’s a method that guarantees your strings won’t slip out of tune as much and won’t lead to unnecessary broken strings.
Let’s jump in:
- What Do You Need to Restring a Guitar?
- Step 1: Loosen the Strings
- Step 2: Cut the Strings
- Step 3: Remove the Strings
- Optional Step: Clean the Guitar
- Step 4: Assemble the NEW Strings
- Step 5: String Your Guitar!
- Step 6: Thread and Secure Strings
- When to Change Guitar Strings
- Now You’ve Got Fresh Strings: Here’s a Great Next Step!
Originally published on April 6th, 2022, this article was republished on January 15th, 2024.
What Do You Need to Restring a Guitar?
- Guitar
- Pack of strings
- String cutter
- String winder
- Flat surface with a blanket or towel (to protect your guitar from scratches)
- A pencil
As optional extras, you might also want your favorite record/album (for listening, of course), and a soothing beverage (be it water, whiskey, coffee, or tea)!
For learning how to string a guitar, I’d use a light-gauge string that doesn’t cost too much — just in case you accidentally break a string while putting it on! If you’re unsure how to pick the right set of strings, just follow the link to the article we wrote on the subject.
Transform Your Guitar Playing
In 10 Minutes a Day
Remember, the secret to a fulfilling guitar journey is consistency, not laborious practice.
Snag your FREE TAC Progress Tracker today and build the skills to learn songs faster in just 10 minutes a day!
Yes, I Want the FREE Download!Step 1: Loosen the Strings

Start at the high E string (the thinnest string). Use your string winder to loosen the tension on the string.
If you aren’t sure which way to turn the tuner, try plucking the note and turning – if you hear the note getting higher in pitch, it means you’re going the wrong way!
Working from the high E string down to the low E string, loosen each string until all six strings are slack and resting on the frets.
Step 2: Cut the Strings

If you have any pent-up anger, now is the time to get it out…
Use your string cutters to snip each string just above the soundhole – you do this so your hardware doesn’t scratch the finish on your guitar!
Step 3: Remove the Strings
When learning how to string a guitar on your steel-string acoustic guitar, you will most likely have bridge pins that hold the strings in place.
Bridge pins are the little pegs on the bridge of your guitar.
Use your string winder to remove the bridge pins.
Most string winders have a notch in them that can safely remove the bridge pins without hurting the guitar.
Pull straight up when you have the bridge pin secure in the notch of the string winder.

DO NOT pull on the bridge pins at an angle! This will most likely snap the bridge pins.
As you remove the ball end of the strings from the bridge, make sure to put the bridge pin back in its hole – that way you don’t have any missing bridge pins.
The next part of learning how to string your guitar involves removing the strings from the headstock (where the tuning machines are).
Caution – the tips of the strings are sharp, so make sure you don’t accidentally stab yourself!
One safe way to manage all these strings is to coil them around each other so they don’t stab you or an innocent bystander!
Optional Step: Clean the Guitar
Once all the strings are off of the guitar, you have the opportunity to clean tough-to-reach spots.
For some of you, you won’t need to do this. But as a good habit, I always like to run a clean cloth across the fretboard, headstock, and near the bridge – these places like to accumulate dust, so it’s always nice to clean them when you have the chance!
Once you’ve cleaned those spots, let’s get back to learning how to string a guitar!
Step 4: Assemble the NEW Strings
Every package of strings has a different naming convention to help identify which string is which. Make sure to read the packaging to learn that convention.
If there isn’t a way to identify the strings, just look at the numbers on the packaging – the higher the number, the thicker the string.
If you’re looking for recommendations on strings, just know that trying different materials, gauges, and brands is the cheapest way to experiment with your guitar’s tone.
Packs of strings can be dirt cheap, or wildly expensive, but almost always strings are cheaper than a new guitar.
Once you find the low E string, open the packaging away from your face – if you aren’t careful, the string can uncoil rapidly and hurt your face.
Once you’ve removed them from their packaging, uncoil the strings and lay them out on your work surface.
Step 5: String Your Guitar!

Take your low E string, and hold the ball end against the bridge pin to create a little bend in the string (as seen in the picture above) – this will help the ball end sit against the bridge plate inside the guitar.
From there, place the ball end of the string into the hole where the low E string goes.
Finally, press the bridge pin inside the hole to secure the string.
It might be a little sticky, so don’t be scared to use some pressure.
Alternatively, if it’s taking too much force to press the bridge pin in, take it out and try it again.
Repeat this process for all of the strings.
At the end of this step, your guitar should look something like this:

Step 6: Thread and Secure Strings
You’ve completed 50% of the tonal transformation that happens when you string a guitar with new strings.
This next part, the final 50%, leads to endless debate amongst guitarists – how do you thread and wind the strings on the tuner posts?
I’m going to show you a popular way that works for almost everyone.
Start by using a pencil to lubricate the nut slots (I like to use a carpenter’s pencil because the graphite is nice and soft).
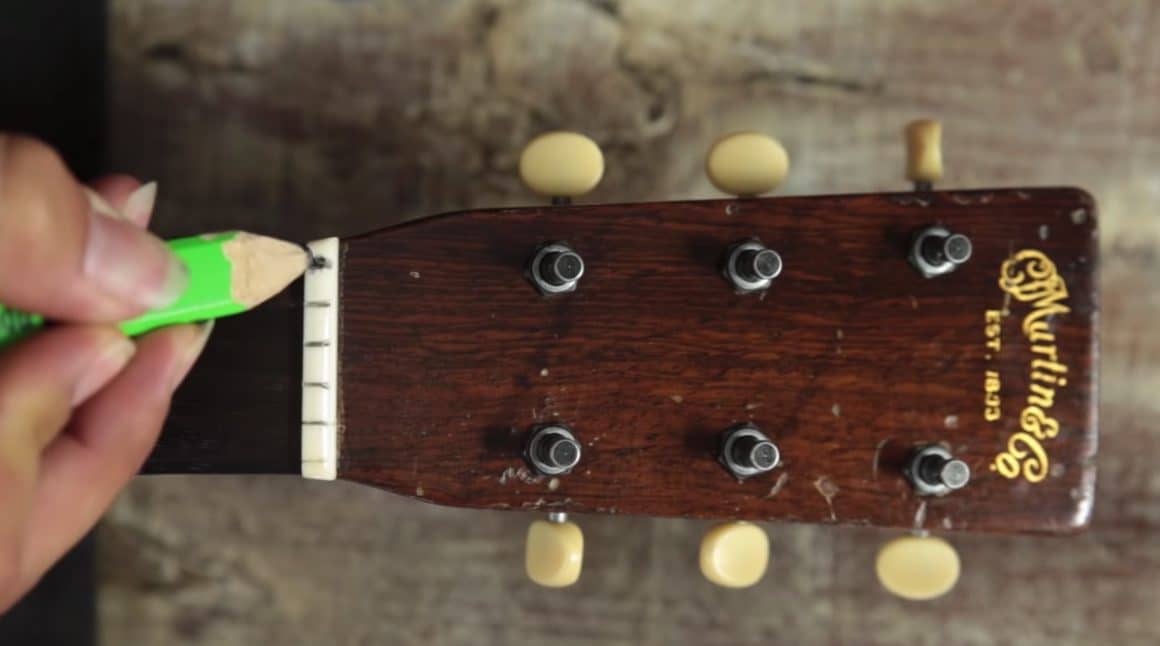
Using the graphite allows the strings to pass through the nut smoothly and will prevent tuning issues once you string your guitar.
How to String Your Guitar at the Tuners
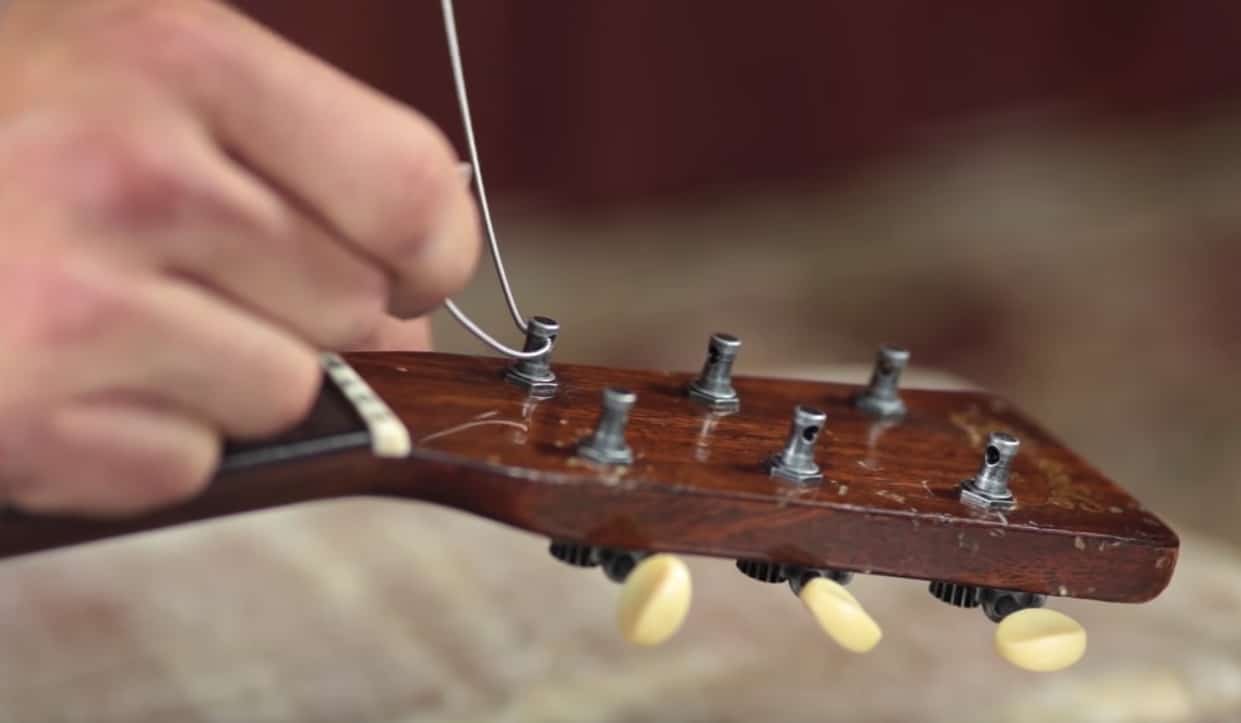
1. Pass the Low E String Through the Tuning Post
Pass the pointy end of the string through the hole in the middle of the tuning post.

2. Pull the String Tight, Then Add Slack
Pull the tail end of the string all the way through the hole in the tuning post. Make sure the string is in the correct nut slot.
After the string is tight, use your hand near the fretboard to create slack on the tuning post.
3. Start Winding the String
As you wind, make sure the first revolution of the tuning post goes over the free end of the string. This will ensure the string locks into place.
4. Make Corrections as You String the Guitar
It’s extremely important that the string first wrap around the tuning post and over the free end of the string; but, make sure the first wrap doesn’t slip off the top either.

5. Ensure Proper String Winding Direction
As you turn your tuning peg, make sure the string is winding toward the center of the headstock.
6. Continue Winding the String
Each successive wind after the first one will go under the tail end of the string toward the headstock.

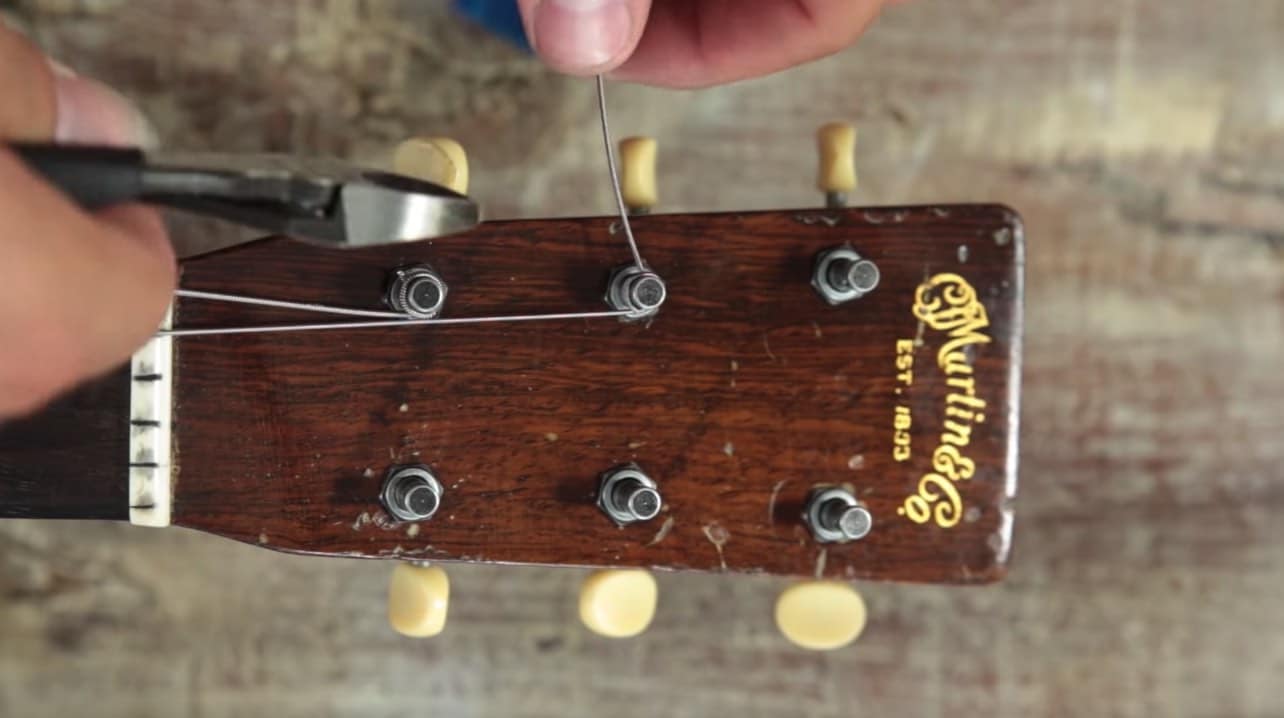
7. Clip the Tail Ends
Don’t forget to clip the tail ends off with your string cutters. Try to cut the tail end as close to the tuning post as possible so it doesn’t snag on anything!
8. Stretch and Tune the Strings
After you’ve learned how to string a guitar, you still have to stretch and tune the strings.
Place a finger on the 12th fret and give the string a little bend. This will help stretch the string and help it acclimate.
When to Change Guitar Strings
Guitar strings, like most things in life, wear out over time.
When you can see dirt, rust, or “funk” on your strings, you know it’s time to change them.

If you look closely at the picture above, you can see the dirt on the string – especially on the 1st fret area.
How often you change your guitar strings depends on several factors including your playing style, the type of strings you use, and how often you play guitar.
As a general rule, I recommend changing your guitar strings every second or third month, or after approximately 40-60 hours of playing time.
That being said, if you notice a significant decrease in tone quality or lose “brightness” in your sound, it’s probably a good time to replace them.
Now You’ve Got Fresh Strings: Here’s a Great Next Step!
It’s essential to change your strings frequently.
When you don’t, your tone can suffer, and you might not have as much fun playing your guitar.
But now that you know how to string a guitar like a pro, I recommend that you put them to good use – and at Tony’s Acoustic Challenge (TAC), I’ll show you how to do just that.
TAC is the guitar workshop that I designed to ensure that you make meaningful progress while having fun at the same time. It’s broken down into a series of bite-sized daily guitar challenges to get you playing your favorite songs, fast!
If you want to get started, watch this FREE guitar glass that will help you build a life of consistent guitar playing in just 10 minutes a day.


Hi Tony.
I am just about to change my strings but I have a quick question.
Why do you cut the strings? I have always just unwound them.
Thanks.
Boofy
What about vintage tuners? The string drops directly in the tuner hole first.
Best tuning video I’ve seen! Thanks!!